When you start drawing full-scale layouts regularly there will soon come a time when you exceed the reach of your dividers. That is where trammel points come into play. Essentially they are just a set of movable points on a long stick. They will prove invaluable when you begin adding curves to your designs. To layout curves, you will either need a thin bendable stick that you can coax into the right shape or you are going to need to find the center point of your curve so you can draw it out. Trammel points give you the reach that you will need to do it. As your projects become larger, trammel points will allow you to step up to longer distances as well.
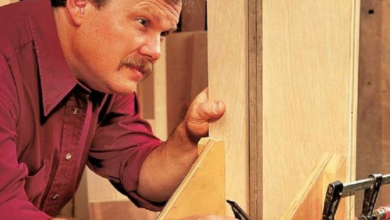
You can of course buy trammel points, but they tend to be pricy. Secondhand can be had for a reasonable price, sometimes. New prices for quality trammel points will give you heart palpitations. Or you can skip the bidding drama and heart medication and just build a set of trammels from a few scraps of wood and a couple of nails. Do I recommend this set for a high-end metal fabricating shop? No. Are they perfectly serviceable for us woodworkers? You bet. Plus it’s another chance to practice your skills and shrink that ever-growing pile of cutoffs you have in the corner of your shop.
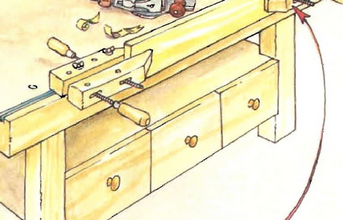
The layout is based on the chisel width that will be used to chop the beam mortise. I used an 8mm chisel. So in my illustration, 1/3D=8mm. If you don’t have an 8mm chisel, I would recommend using a 1/4″-3/8″ or 6mm-10mm chisel. Just use what you have. I used hardwood for the trammel heads and pine for the beam. Pine is light, stiff, and dimensionally stable. For the pins, I used a couple of finishing nails. They are a little soft but very serviceable in this application. You can make your metal points from anything you have to work with.
Hopefully, my illustration will be enough for you to build your trammel points but let me point out a few things that will make the build go a little smoother.
- Lay out your trammel points full scale on a piece of heavy-weight paper, plywood, or any flat stiff surface. I like to use wood because as you lay out your module key the dividers will leave an indent in the wood. These indents make it easy to reset your dividers to a desired distance from the module key.
- Chop the beam mortise first then make a plug to install in the newly chopped mortise. This plug will prevent any major chip out of the beam mortise walls when you chop the mortise for the wedge.
- Make your beam any length you want. A beam about arm’s length will serve you well for furniture work.
- Pay special attention to the beam. The more uniform the width and thickness, the smoother the trammel heads slide along the beam.
- Take your time and enjoy the process.
Instructional Drawing: